Christmas Ornament Crochet Along Day 6, a stocking, and a Recipe

Today was James’ birthday, and he asked for carrot cake. I spent part of the afternoon browsing through recipes and came up with a mish-mash of things I wanted to try. I was inspired by this recipe here, among others. The cake turned out great! It was tender and fragrant with just the right combination of spices, so I thought I’d share my results:

James’ Carrot Cake

Cake
DRY
scant 2 c sugar
3 c flour
3/4 t of Salt
4 1/2 t of baking powder
3/4 t of baking soda
3 teaspoons of cinnamon
2 1/4 t ginger
3/4 t ground cloves

WET
4 1/2  c shredded Carrots
Juice 3 oranges (about 3/4 cup)
3/4 c Canola Oil
2 t vanilla

Filling
1 c raisins
1 c boiling water
1 c pecans, toasted 10 min. at 350 degrees, cooled and chopped fine.

Cream Cheese Frosting
1 8 oz package Organic Neufchatel Cream Cheese or Vegan Cream Cheese
1/2 c non-hydrogenated margarine
3-4 c powdered sugar
2 tsp vanilla
zest of one orange
Preheat oven to 350.

In a med. bowl, mix dry ingredients. Whisk to combine. In a large bowl, mix wet ingredients. Add dry ingredients to wet, and stir to combine. Pour into two 9-inch round greased and floured cake pans. Bake for 20-25 minutes or until done. Cool.

To make filling, pour boiling water over raisins and allow to soak until cooled. Pour off most of the water, then put raisins in the blender and purée.

To make the frosting, whip cream cheese and margarine with vanilla then add powdered sugar until frosting reaches a thick smooth consistency stir in orange zest.

When cake is completely cool, spread filling on top of first layer, then spread frosting on top. Sprinkle pecans on top of frosting. Place 2nd layer on top of first. spread filling thinly on top of 2nd layer, then frost entire cake and garnish with pecans.

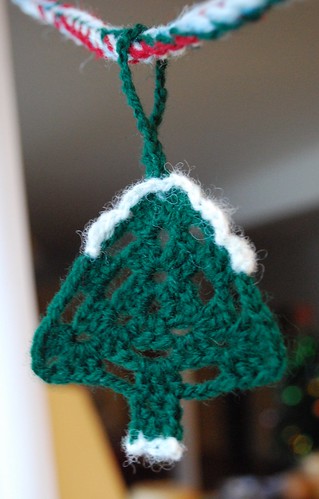
Oh yes, an ornament… I’m making this cute little stocking today, featured on the Beansprout Creations blog. It looks like she began designing an ornament a week back in September, I haven’t looked through all of them yet, but this one sure is cute.

Christmas Stocking, from Beansprout Creations


Christmas Ornament Crochet Along Day Five: Danish Hearts

When I was a teenager, we had a Danish exchange student stay at our house. He brought some fun Christmas traditions, and he taught us how to make danish paper hearts.

Christmas Paper Hearts
Christmas Paper Hearts, from Flickr User Ebygomm, Creative Commons

When I was a junior in college, and living in Paris, Morten invited me to come spend Christmas with his family in Danmark. We made marzipan candies, and placed wooden shoes out at Christmas Eve, and we danced around a lighted tree. Christmas in Danmark is magical. I thought today I’d try and crochet some Danish hearts. I found a pattern, which I’ll use at least as a starting point.

Speaking of Scandinavia, the Swedish festival of Santa Lucia, their winter festival of lights is coming up on December 13th, so we’re making some Swedish press cookies today as an early celebration. (We need to do anything we can here to celebrate the light–we have blue sky today for the 5 hours of brightness that we got, it was lovely!)

Christmas Ornament Crochet Along Day Four: Ellen’s Stars

Ellen Bloom is one of the rock stars of crochet. I love her style, her obsession with Noro, granny squares, and her love for LA which is all documented beautifully and with humor on her blog, LA is my Beat.

Ellen designed these little stars and told me about them when I mentioned I was doing this Crochet-Along. I begged her to post the pattern on her blog so we could all make some, and she agreed. Thanks, Ellen!

Star Ornament, from ellenbloom.blogspot.com

Tonight, our little town is having it’s big Tree Lighting, the opening of the two-day Christmas Bazaar, and of course a small parade with a visit from Santa. On top of that, Selma’s got The Christmas Carol (She was awesome last night!) and I’m going to a “progressive dinner,” where the appetizers are at one house, the main course another, and the desserts a third. Because this is Cordova, it’s pot luck, too. I’m on the dessert list, and I spent way too much time today making a cake. Chocolate Pecan Bourbon Cake. (yum!) It’s currently still in the bundt pan because I’m always anxious about getting cakes out of bundt pans without breaking them, so I’m putting it off until absolutely necessary. I also spent too much time today worrying about whether I needed actual Bourbon in the cake (which we did not have) or whether I could use scotch, of which we have probably too much. In the end, I decided to get some bourbon, but I think next time I will try the cake with scotch instead to see if I can detect a difference. (All in the interest of scientific and culinary discovery, of course).

A NOTE ABOUT THE POINSETTIAS: In the pattern, it says “do not fasten off” after making the first petal. This did not work for me, (maybe I was just misinterpreting the instructions)I found I would have had a string of petals, not exactly what I was looking for. So I fastened of and just slip stitched each petal to the preceding one. This makes for more ends to weave in, but the end result looks like the picture. What about you?

Christmas Ornament Crochet-Along Day Three: A Poinsettia

Ok–I still haven’t figured out how to fit photo shoots into these short days very well. So I may have to have a big ornament shoot on Saturday when I’m not getting kids to school, running around planning Christmas pageants, etc. December is so crazy! I’m looking forward to the quiet of January and February, but for now, I’m enjoying the crazy too.

Today’s ornament is a sweet little poinsettia that will work up super-fast. It’s from the Lion Band web site. (Warning: you must register to get access to this site, I’m sorry about that.)

Poinsettia Ornament
Poinsettia Ornament, from Lionbrand.com

This pattern requires a French Knot-which is a simple embroidery stitch, but it’s not explained in the pattern. Here’s a nice tutorial from The Purl Bee.

I’ve created a Ravelry Group for the Ornament crochet-along where you can share pictures, and talk about patterns. Of course, you can also leave comments here on my blog with links to ornaments you’d like to try or ones you’ve made.

I’m off to see Selma performing in A Christmas Carol tonight. Tomorrow, I’m making a star designed by Ellen of LA is my Beat, and then next week I want to focus on mini-wearables–mittens, hats, sweaters, etc. So keep your eyes peeled for patterns and let me know what you find!

Day Two: A Snowflake Ornament Two Ways

One of the fun things about this project is finding out about new blogs and web sites that I haven’t seen before. I found out about today’s snowflake ornament from someone on Twitter. She pointed me to the blog, Attic24–written by a wonderful British crocheter with a love for granny squares. She has a step-by-step tutorial for this snowflake which she originally discovered on the Red Heart web site.

Here are Lucy’s snowflakes from Attic24:

lucy-snowflake

(Photo from attic24.com)

The Red Heart Snowflakes began as a garland–I was teaching at The Net Loft today, and taught a young girl to make the garland version out of Brown Sheep Bulky–she whipped out a pile of them in a jiffy, and they join as you go–fun!

garland

(Photo, from redheart.com)

I made two today in different sizes with the Jaimeson, but I’ll need to photograph it tomorrow, it was already too dark here at 3:3o when I left work!

A Christmas Ornament Crochet-along (Free Pattern)

Advent Garland Day 1

Surprise! I made something that’s not a hat. Last night I finished Nanowrimo (National Novel Writing Month) a winner. That means I wrote over 50,000 words on my novel in the month of November. I got very close to actually finishing the novel too, but it’s not done. I do want to finish it, hopefully soon while I still have the momentum.

But not today! Today is the first day of Advent–the countdown to Christmas, and for Jay’s  birthday, which was on Saturday (he’s five!)

Jay's Birthday Party

Jay received a Lego Advent calendar, so I know he’s going to have a good time counting down the days. I looked everywhere for something fun for Selma, but all I could find were cheap chocolate advent calendars, and that’s not really what I was looking for.

So, sometime last month, I tweeted, “Contemplating making a mini crocheted ornament for each day of Advent, am I crazy? Or do you want to join me?”

I thought this would make a nice keepsake advent calendar for Selma. I kept thinking about the idea, then the other day, while I was still novel-ing and not crocheting, I went looking for yarn for the project, and found this:

P1020044

Jaimeson’s has a great color palate, and I chose traditional red and green, plus white, and a nice icey blue. It’s two-ply fingering weight, so my ornanments will be petite. I originally had thought about using crocheted thread, but decided wooly ornaments would be more fun. Becca was with me when I was choosing yarn and she decided that she’d make the ornaments too. She chose a more heathery palate that I think is also beautiful. I’ll try and get some photos of her ornaments too.

I’m going to be hunting for ornaments or motifs online and in books, and I’ll post the sources here on the blog so you can crochet along with me. I’m open to suggestions to!

Today’s little tree was inspired by the lovely Royal Sisters blog. Michelle created a pretty tree based on a triangular “granny.”

I wanted a granny tree too, but a tiny one, so here’s what I did:

Using a 2.5 mm crochet hook. Ch 4, sl st to form a ring.

Round 1: Ch 3, working into the center of the ring, 2 dc, [ch 3, 3 dc] two times, ch 3, sl st to top of initial ch-3 to join. Do not turn.

Round 2: Sl st to nearest ch-sp. Ch 3, [2dc, ch 2, 3 dc] into ch-sp, [ch 3, (3 dc, ch 2, 3 dc) in next ch sp] two times, ch 3, sl st to top of initial ch-3 to join. Do not turn.

Round 3: Sl st to nearest ch-sp. Ch 3, [2dc, ch 2, 3 dc] into ch-sp, [ch 3, 3dc in next ch-sp, ch 3, (3 dc, ch 2, 3 dc) in next ch sp] two times, ch 3, 3 dc in next ch sp, ch 3, sl st to top of initial ch-3 to join. Fasten off.

TRUNK
Pick one side of the triangle to be the bottom. Join yarn to right side of center 3 dc with sl st.

Row 1: Ch 3 dc in ea. of next 2 dc, turn.
Row 2: work as for row one, fasten off.

SNOW: Change to white yarn, join with sl st at bottom edge of trunk, sl st across 3 sts. Fasten off.

With RS of tree facing, and trunk at the bottom, join white yarn in 2nd ch-sp on right side (see picture). [ch 3, sl st to next st,] five times (or six, if you want symmetrical snow), to make the snow on the top of the tree. Fasten off.

Hanger: with green yarn, join to back of tree, ch 30, sl st into 5th ch from hook to form button loop. Sew a 1/4 inch shank button to the back of the ornament at the top of the tree. fix loop over button to secure around garland.

Weave in all ends. Wet block and shape as desired. Lay flat or hang to dry.

I made a garland using a 5.5 mm hook and chaining with all four colors of the Jaimeson Spindrift held together. Mine is about 70″ long.

Yes, another new hat: Ganomy

Elizabeth Zimmerman named this hat “Ganomy” after the funny way that someone in her family pronounced “Gnome.” It does really have an elfish look to it, and if I wasn’t already a fan of the silly hat, I probably wouldn’t have been drawn to it. I’m glad I was. the mitered corners on this hat make it hug the ears and the shaping also allows for the hat to go lower in the back than in the front protecting the back of the neck.

Ganomy Hat - Front

I added the minimal bit of colorwork myself. In true EZ style, the pattern was just a simple paragraph of text, which you get to interpret as you like. I did find out after I made this that the pattern is included along with an article in the current issue of Vogue Knitting. Another bonus: When you’re flying down the slopes, the pointy part will stick straight up, looking even cooler than it does flopped to the side. (We took these pictures back before the snow that started earlier this year than it has in a while).

Ganomy Hat - Side

Today it looks like January outside, except darker since we have over a month to go before the solstice. I’m glad for the snow, though. It’s much better than rain. I have had to abandon shoes for the season and dig out my boots.

James, however, has decided to extend the cycling season by installing studded tires on his bicycle. This is how he got to work this morning.

James' Snow Tires

I’ve been a bad blogger lately. I think it has something to do with twitter and facebook I like the convenience of the little micro-posts I do there, and then I feel like I’m being redundant talking about something on the blog that I may have already linked to on Twitter. What do you think?

I’m also attempting Nanowrimo (National Novel Writing Month) again this year, and so I get my writing quota in by making up unlikely things for my characters to do. I’m at the half-way point, and I think chances are about even for my finishing the 50,000 word challenge.

I’m in the finishing stages crocheting two lace-weight shawls that are taking me forever. Even though I love them both, I will be so happy to be done. I will then start work on some new Big Projects that up until now have been just in the mental planning stages. Expect to hear more soon.

I’m also re-starting my work as co-editor of Inside Crochet magazine. Julie Holetz and I were happy to be asked to come back for another year of issues, and we will start work in December. (We were especially excited by the preview of Issue Five, just released–you can see the preview at the KALMedia flickr site). We’ll be on the lookout soon for submissions, so if you’re interested in contributing to the magazine, you can e-mail me.

Recipe: Lentil-Pecan “meat” loaf

Veggie Loaf - 1

A few folks on Facebook took issue with me calling this dish “meatloaf.” (They were not vegetarian, ironically). I usually call it meatloaf because then people know what I’m talking about, and “veggie loaf” just doesn’t sound very appetizing. (Have you noticed that loaf is one of those words that starts to look strange after you stare at it for a while?) You can decide for yourself what to call it. My family called it delicious-even Jay who usually sticks to eating PB&J or spaghetti enjoyed dipping bits of it into ketchup. I made it because I was walking by The Cordova Café and saw a sign advertising “Cold Meatloaf Sandwich,” and that sounded so good.

Ingredients

3/4 c lentils
1/2 c oats
1/2 c brown rice
1/2 c raw pecans (chopped fine)
1 can diced tomatoes (drained, reserving liquid)
1/2 t salt
2 T tahini
1 T sesame oil
1 T soy sauce
1 T Dijon mustard
2 t marjoram
1/2 c. bread crumbs (I used panko)

Cook rice, lentils and oats separately.

Chop pecans.

Combine cooked rice, lentils oats in pecans, add remaining ingredients and stir to combine. If the mixture seems dry, add a little of the reserved tomato juice. If it seems too loose, add a little more breadcrumbs.

Press into a greased glass bread pan and bake at 350 degrees for about an hour or until browned an crispy.

Tools right at hand

I recently made a châtelaine. Dotty at The Net Loft had a class on pattern darning, and this was the project we worked on. I had never heard of this great little tool, a belt, of sorts that you wear around your neck to keep tools at the ready. Mine has scissors and yarn needles. I think it would be nice to attach a tape measure to it too, if I could find a pretty little one. (Conversely, one could make a châtelaine out of a measuring tape and hang the tools off of it, that would be convenient if perhaps a bit long about the neck).

Châtelaine - 1

Châtelaine’s appear to have been most popular in the 19th century, although their appearance as a low-slung belt has them sometimes confused as a medieval accoutrement. Sometimes the châtelaine was a brooch with the tools hanging off of it like charms and then pinned at the waist. Apparently folks collect the old ones. The word is French, and means, literally, ‘the lady of the house’ (or chateau), because it was she who wore the thing in order to have all of her necessary items close at hand. Earlier forms of châtelaine were called équipage (which is also French and pretty much means ‘gear’ or ‘equipment.’)

The “belt” part of my châtelaine is made using something called “ribband,” which is basically cross stitch fabric in a ribbon shape with a finished edge. It’s sold by the yard, and it could be used to do all sorts of things, like make your own decorated ribbon, or hair bands, or hand towels, etc.

Châtelaine - 2

Pattern darning is a kind of embroidery which is fun to do because it is very fast. It mimics weaving. You work a running stitch in a pattern the entire length (or width) of your project. As the running stitches build, the pattern develops. I used Valdini hand-dyed thread which gives the project a nice, subtle color variation. I splurged on good scissors for my châtelaine, and I’m protecting myself from the tips by putting a knitting needle point protector at the end. (We punched a hole in the point protector so I could attach it to the scissors too). Right now, I’ve put a little Clover Chibi needle holder on the other side, but I may switch it out for a prettier needle case if I discover one. The rings on either side add a bit of weight and help the belt to lay flat around your neck.

My Grandmothers, pioneers of creative re-use

Daisy Apron

Sitto, (my mom’s mother) was a big fan of smock-style aprons. I like them too–they have pockets, and cover the whole front of you. I have a small collection of my Sitto’s aprons, and my mom does too. I find simply wearing them can sometimes help me channel some of Sitto’s domestic ability. Some of the aprons Sitto made herself, and some she brought back from Okinawa when she went there in the 1960’s to visit my Uncle Jack and Aunt Carole who were stationed there with the Air Force.

Yesterday, I got another one in the mail from my Grandmother Jean. I recognized the fabric immediately even though I may not have seen the apron before. Grandma sent a note with the apron:

“I thought maybe [this apron] would fit Selma and she would enjoy wearing it, knowing where it came from. It really came from some kitchen curtains I had made out of two old bed sheets. Sitto also made me a casserole carrier from the same curtains and I made a zillion napkins of all sizes so the material has been in the family for a long time and served us well. It needs some buttons replaced and I’ve included the buttons in one of the pockets.”

So this is the third incarnation of those particular bed sheets.  It kind of makes you regret ever throwing anything out, doesn’t it? I think I’ll go sew on those buttons and see what else I can mend.